www.BadgerTrek.comAbout/ContactWeb LogOur Camper Van
Resources:Hobbies:MotorcyclesAmy's CakesOutboard Hydroplane RacingRadio Controlled Toys |
Repacking Dana 60 Wheel Bearings
This is the set of steps I use to repack the wheel bearings with grease in our Dynatrac ProRock 60 front axle. The bearings, seals, and basic steps should be the same as a mid-90's Ford F350 front Dana 60 axle. Our axle has Warn Premium Locking Hubs, though other locking hubs should be similar in construction.
Recommended intervals seem to be about 20-30k miles. The heavier the vehicle, or the more heavy braking you do, the sooner you should repack. Old grease becomes black and lumpy with use and heat, eventually turning dry with over-use.
As a minor preventative step (carried over from hauling trailers) I like to check the hub of all our wheels for any excess heat at every stop on a long trip. This lets you catch heat from a stuck brake caliper (dragging a pad) or a bearing running dry of grease early, and hopefully before damage sets in. Just a quick hand touch to make sure it is not significantly warmer than any of the others (the sunward side can be a few degrees warmer on a hot day).
Basic steps:
Preparation
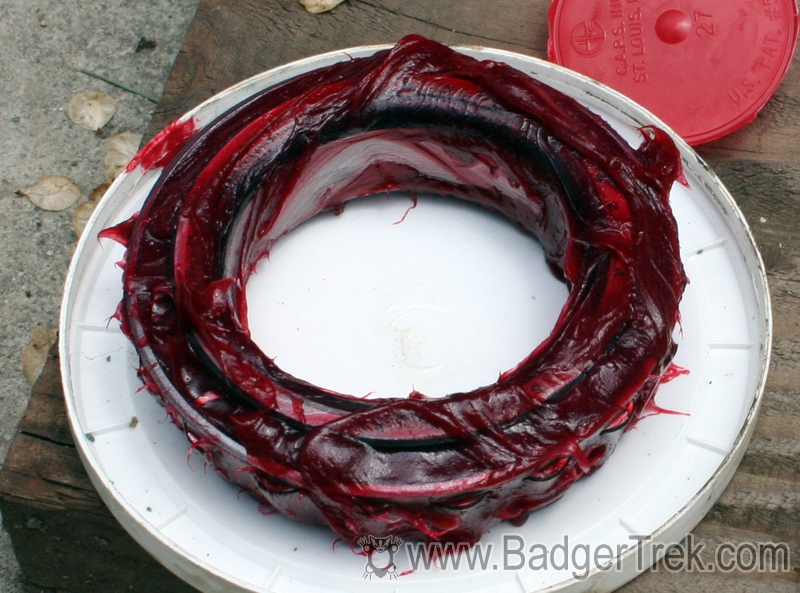
- Make sure you have wheel bearing grease for disk brakes (handles high temperatures better). I used Amsoil Synthetic wheel bearing grease rated for disk-brake hubs. Mobile 1 also has a tub of synthetic disk-brake bearing grease available for about 6$ at the local auto store.
- 2 New inner hub grease seals (one per hub). You may want one or two extra (they are cheap) incase you bugger one up figuring out how to tap them in squarely, as you will need them again in another 20-30k miles or so anyway.
- Six point spindle nut socket
(ours uses a 6pt, there are also ones that use 4pt sockets)
Disassembly
- Remove wheel
- Remove caliper & place on springs (don't hang it by the brake line, unclip ABS wire from brake line first)
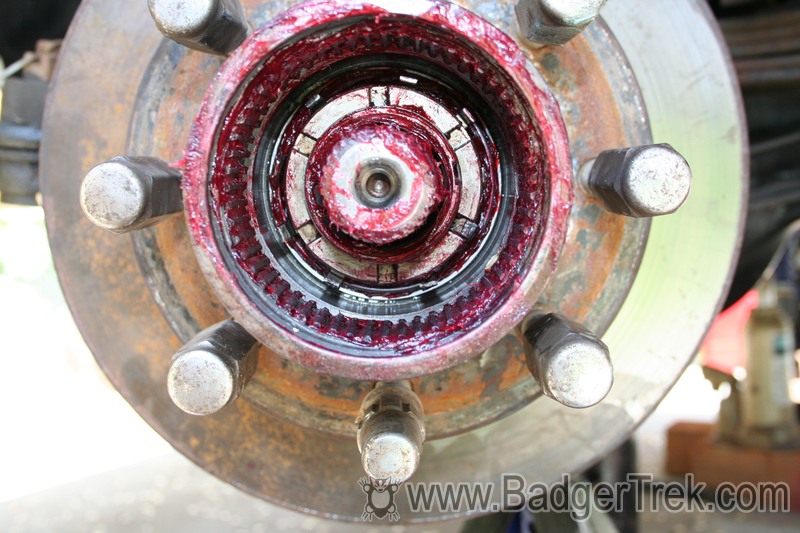
- Remove locking hub cap (6 allen head screws) and big O ring
- Remove spiral snap rings (2 of 'em in our case) in inside rim of hub (used a pick and small needle-nose pliers)
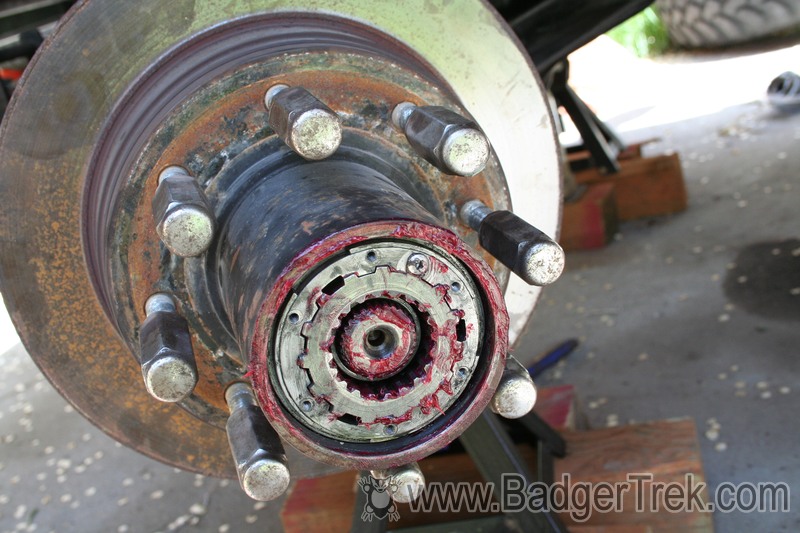
- Pull out locking hub body (2 of the screws from the hub cap can help here)
- Use screwdriver to reach in and bend out lock-tab on spindle spanner nut
- Use spanner nut socket (huge, 6pt for us) to unscrew spindle nut (this one should be tight)
- Remove lock washer with bent tabs
- Remove 2nd spanner nut in same manner (this one should NOT be tight)
- Clean and inspect all parts of locking hub (from left to right: 2nd spanner nut; lock washer; 1st spanner nut; locking hub body; return spring; locking hub star; 2 spiral snap rings; Sealing O ring; Hub face; Allen screws)

- Carefully pull off hub, supporting its weight so as not to scratch up spindle or drop out outer bearing
- Clean spindle and inspect for problems
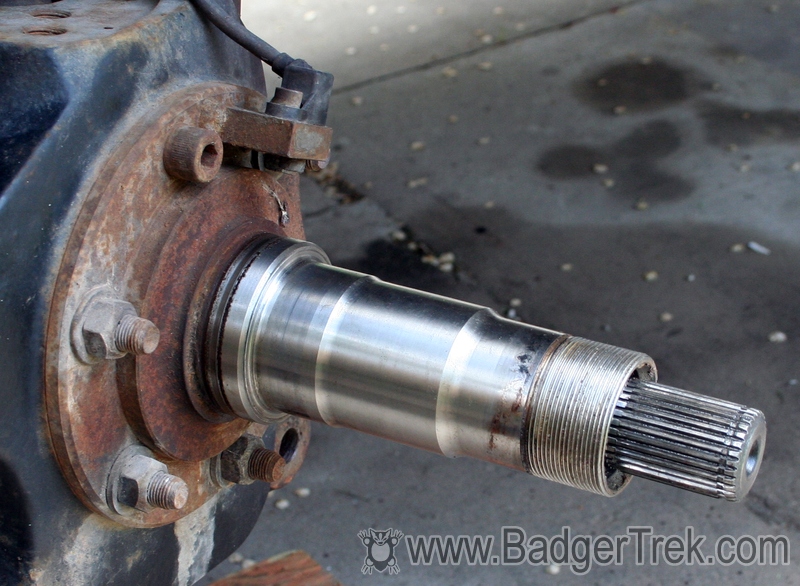
- Outer bearing pulls right out of hub (careful not to drop it when removing hub from spindle), clean, inspect (Do NOT leave the bearings dry of grease for long as they will easily corrode. Spray with WD40 if leaving for a while)
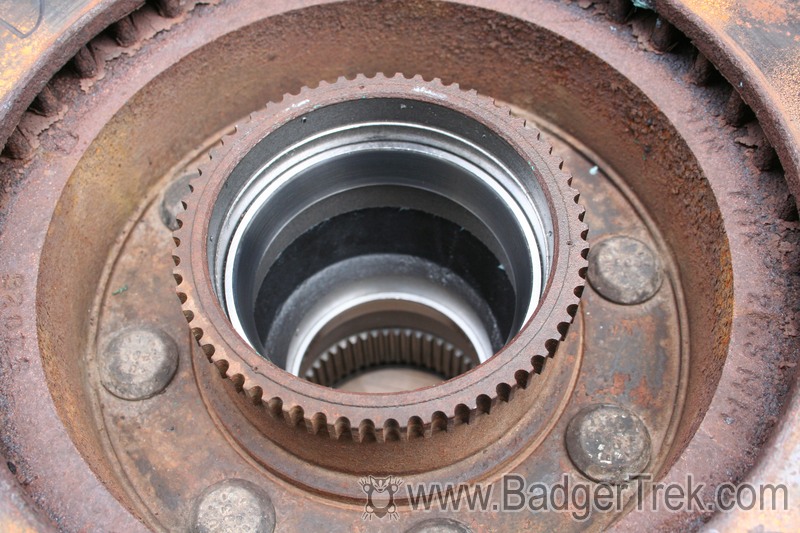
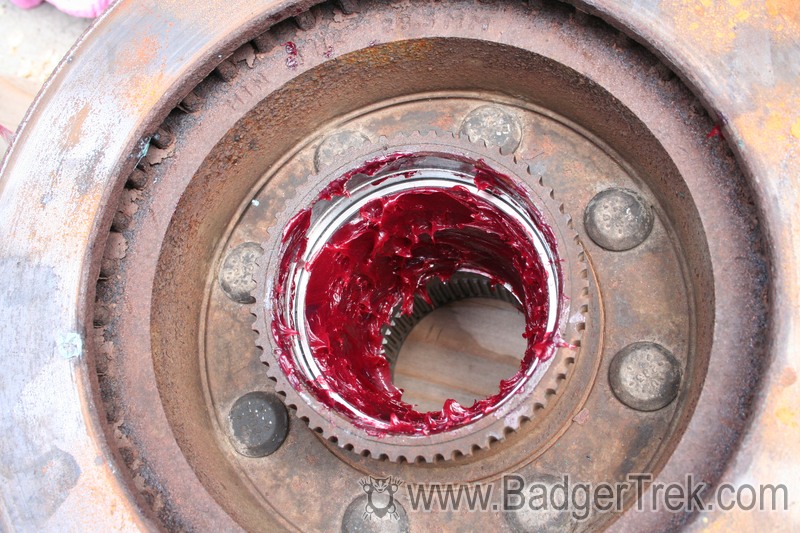
- Inner bearing is behind disposable grease seal, loosen seal by tapping in with punch and hammer to release glue
- Pull out seal with seal puller
- Remove inner bearing, clean, inspect
- Clean all the grease out of the hub (there is a lot between the bearings, its never used, but may be of incompatible type with new grease, causing failure). I used about 1 can of brake-cleaner to clean both hubs after removing the bulk of the grease with paper-towels. Note that some of the machined edges inside can be VERY sharp (Do NOT leave the hub dry of grease for long as it and the inner races can corrode easily. Spray with WD40 if leaving for a while)
Reassembly:
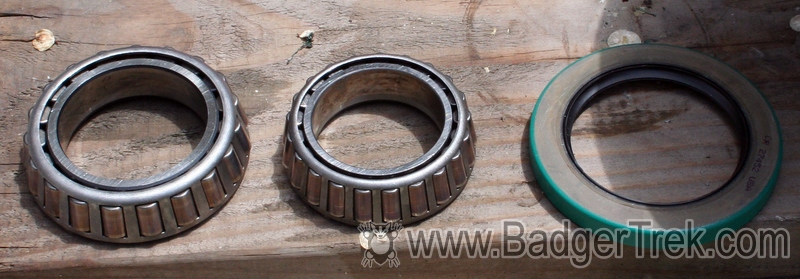
- Make sure bearings have in good shape and clean, new seals are ready to install
- Pack bearings with grease (squeeze in from large end till it fills carrier and comes out at small end and around rollers (you don't want any air gaps inside the bearing cage at all)
- Fill hub between races of inner and outer bearings with grease (to keep from that area sucking up all the grease in the bearings at speed)
- Put in inner (rotor-side) bearing so it sits in its race (note the direction of the cone on the race and bearing)
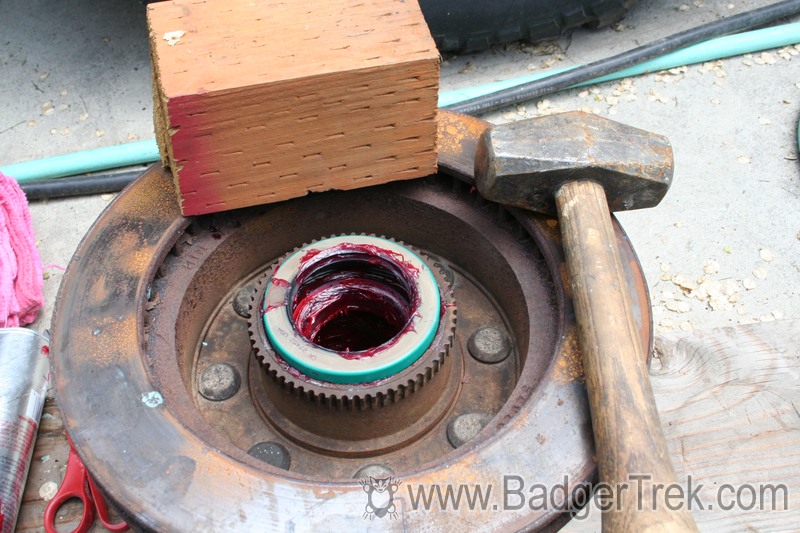
- Push in new grease seal till flush with hub. It is a tight fit and will require some hammering. I use a flat block of wood to keep everything square and distribute the force of the blows. Start out gentle and make sure the seal is going in square.
- Put grease in seal groove
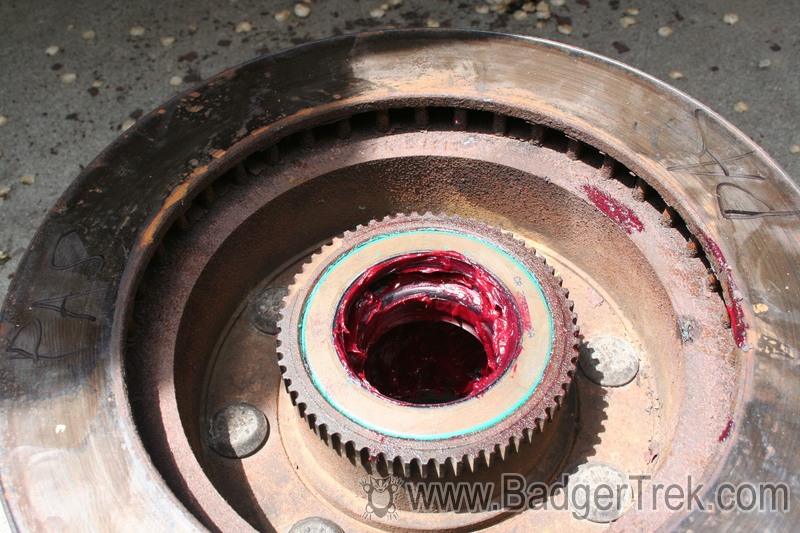
- Put hub back on spindle, careful of the grease seal, support the weight of the hub till it bottoms on inner bearing
- Push in outer bearing, over the spindle, till it is in its race and supports the outside of the hub
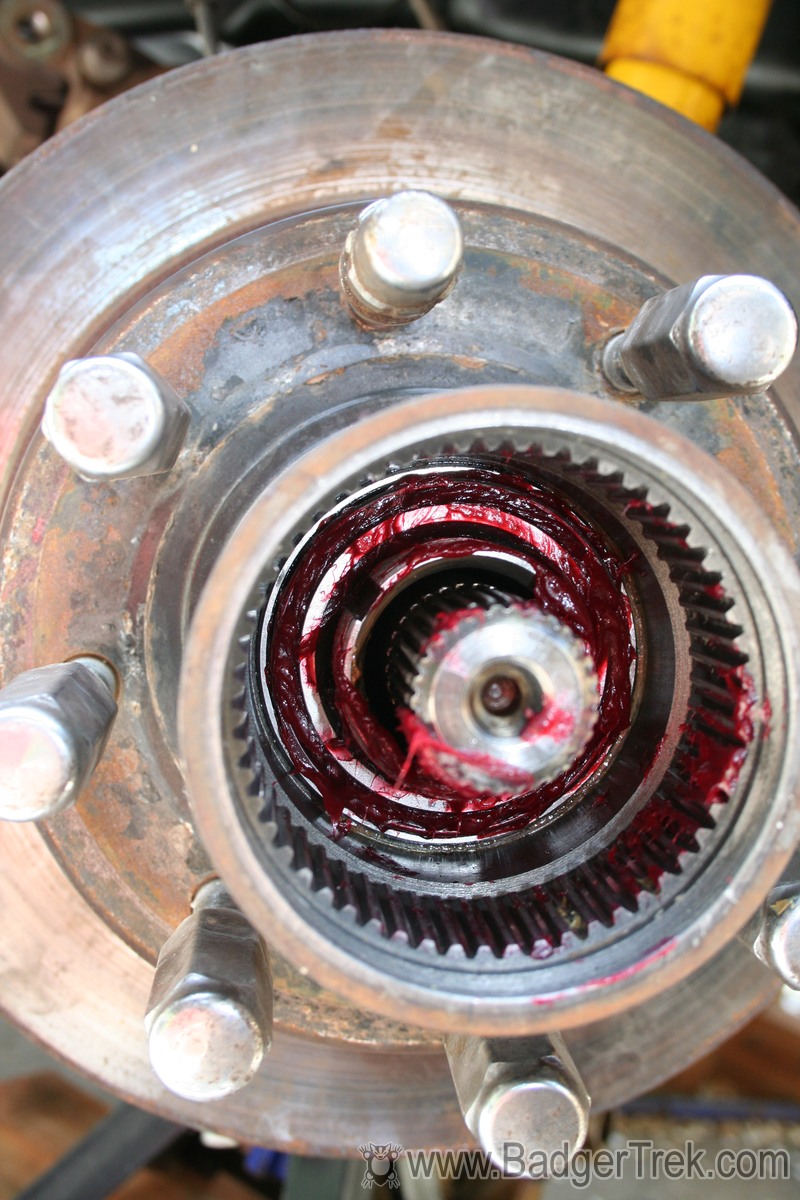
- Screw on inner spanner nut, 50ft-lb, back off 1/4-1/2 turn (till it loosens up), tighten up again with hand on socket only. Hub should spin smoothly, no looseness or binding

- Lock washer with tabs goes on
- Grease & screw on outer spanner nut, 70ft-lb
- Bend a tab from the lock-washer into a spanner nut slot (w screw-driver) to lock it in place
- Put in locking-hub parts in reverse order to disassembly (left to right in picture). Make sure to check that the hub can engage and disengage after assembly. If you get bearing grease in the slots the engagement mechanism travels (inside and/or outside) it may not have enough freedom of movement to engage fully.
- Put on caliper (166ft-lb)
- Put on wheel
- Check brakes before you go drive, may have to pump them a bit to get the pads back down to the rotors.