www.BadgerTrek.comAbout/ContactWeb LogOur Camper Van
Resources:Hobbies:MotorcyclesAmy's CakesOutboard Hydroplane RacingRadio Controlled Toys |
Sportsmobile Exterior (Awning, Rack, Steps, Flares, Etc.)

How it came:
The van was ordered with an awning, penthouse top, rear-tire-carrier, Yakima roof-rack rails & bars, and 8 cubic foot under-floor storage box. All items were left stock white, as was the van for reduced cost and less heat absorption/radiation.
Awning -- The awning is a Fiamma awning common to many motorhomes and seems to work well on the few occasions we have had it out. The awning is mounted to the side of the van on 3 steel brackets which are bolted to rubber grommets in the van (according to SMB this is so that it will pop off if wind or an object (tree?) hits the awning too hard, instead of breaking off). Nice when sunny or drizzly, but a stiff breeze will blow it about and cause much misery as you try to roll it in.
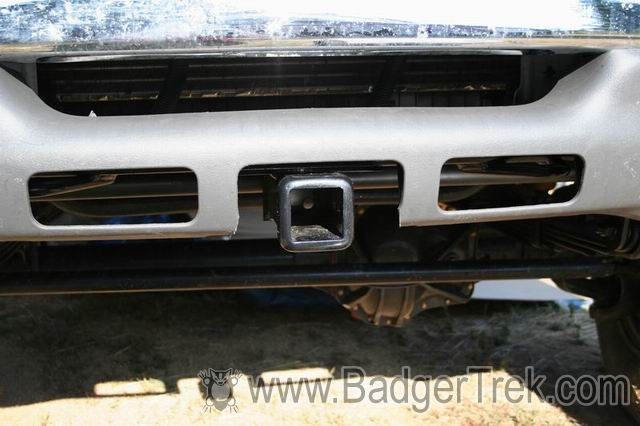
Front Receiver - Very useful for holding bike racks, storage boxes (e.g. Thule ), winch-trays, etc. The 4x4 conversion from SMB precludes the addition of a standard aftermarket front receiver due to the leaf-spring suspension mount points. SMB has a front receiver that accounts for this, though self-install requires the front bumper be removed and 6 large holes be drilled in the right place (Need a BIG drill, and a lot of patience).
Rear Spare Tire Mount - Nicely made carrier allows the spare on the back and thus the under-floor storage box which is worth its volume in gold for the storage it provides. Manufacturer is Aluminess who also make some nice (though expen$ive) bumpers that many people get with their van. In December 2006 this was replaced with a full-on Aluminess rear bumper with tire carrier and box (see our Bumpers page).
Under-Floor Storage Compartment - Accessed through a trap door in the rear floor inside. Appears to be water-tight. The amount of stuff that can be stored in here is rather staggering, though stack things well as they will shift, and things at the bottom will require removal of all the stuff on top to access. It has a water drain hole with a plug if you want to use it as a cooler. The under-floor storage box is "awesome" in its utility. The volume is impressive, and enough for us to fit a tool-box, porta-shower, jack, tire-chains, tent, sleeping mats, camp-stove, saw, and a bunch of other odds-and-ends.
Roof Rack Rails ( Yakima ) - Great for bikes, storage boxes, etc. Not installed symmetrically.
Front Steps -- We got steps for the front doors so that accessing the driver & passenger seats wouldn't be a big pain. When stopped we drop a small step-stool out the side doors for easier access there. We didn't want a permanent step there due to the reduced ground clearance nearer the center of the wheel-base.
Issues:
- We sometimes have a fair bit of stuff stored on the top of the penthouse roof, which means we walk around up there periodically. There are some places near the edge of the roof where the fiberglass seems more flexy than others, and small hair-line cracks are forming where the consistency changes. We try very hard now to not place our weight near the edge of the roof. Some of the cracks have turned out to be from the inside screws holding the ceiling up which are a touch too long. The cracks let some water in which rusts the screws.
- The pent-house raises and lowers unevenly. The passenger side is always an inch or so behind than the driver's side, going up or coming down regardless of the tilt of the van or load on the roof. It seems that the actuators on either side are somewhat out of synch. It has been this way since day 1 and doesn't seem to be changing.
- The roof rack rails themselves are not even. The one on the right side was installed about 1" further forward than the one on the left. This isn't a real big deal, but is sloppy, and makes getting the cross-bars straight a bit more work.
- There is no pad to prevent the tire carrier it from banging into the rear door when both are open and the wind or gravity pushes.
- The lower hinge bolt on the tire-carrier was a bit too short and the nylock nut on it was thus not on far enough to stay locked on. The bolt will not fall out without removal of the rear bumper, but getting things restored after ours vibrated off required finding a regular nut of the right thread and a bunch of lock-tite to hold it in place.
- When in rough off-road situations even the driver & passenger side hoop-steps are vulnerable to damage, and we have chipped the aluminum a bit on the driver's side step. Unbolting the steps is a pain and leads to us not removing them when we should.
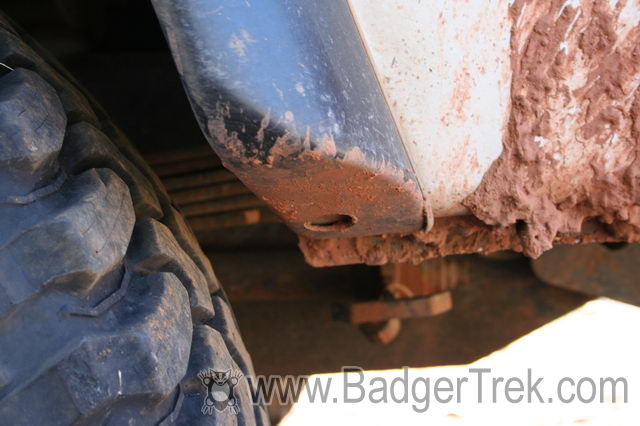
- The fender flares are hollow, and not completely sealed against dust, dirt, and water. After some time the ends became packed with large chunks of mud and sand, which would abrade the paint and metal behind the flares.
- The under-floor storage compartment does have a leak somewhere that lets in road dust as it is often quite full of dust after a day on a dirt road, yet the interior of the van is still fairly clean. There is a drain plug at the bottom of the box to let out water, but it is quite well sealed and not the source of the dust to our determination.
What we added/changed:
- Textured foot tape (for bath-tubs) around the places we walk on the roof as it gets very slippery when wet
- Added Yakima bike carriers to the roof rack for our mountain bikes (later replaced by self-built bike rack on new Aluminess Bumpers)
- Thule Evolution 2100 Roof Box for additional toys & storage (large enough to fit our paragliders, camping gear, satellite dish, etc)
- Added a bug-deflector to the front of the hood to try to keep the number of bugs on the wind-shield down. Don't know if it helps as we still get lots of bugs, but perhaps there are fewer.
- Added a chunk of solid neoprene rubber to the rear door where it can contact the rear tire carrier to prevent scratching and denting
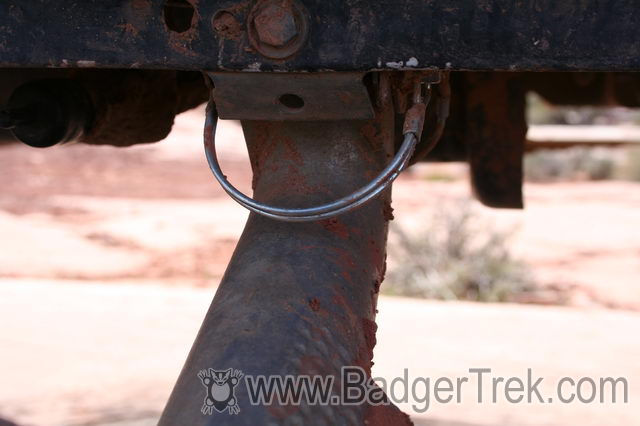
- Removed the bolts holding the hoop-steps and replaced them with 5/16"x2.5" D clip pins. In this way we need only pull 4 pins and each step will pop right off, making them easy to remove when tackling technical terrain.
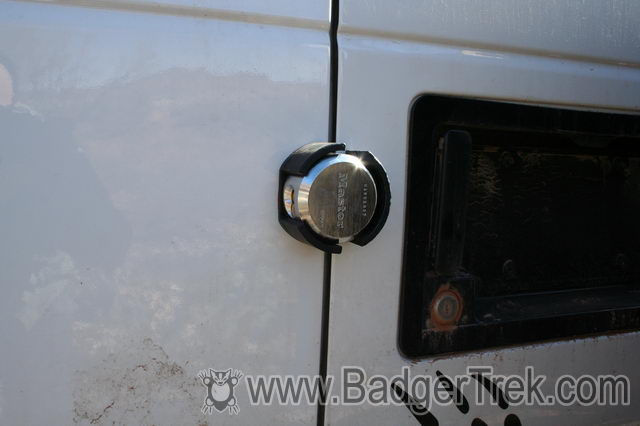
- For security we did not wish to rely soley on the Ford door locks since they can be opened with a slim-jim, the electronic code defeated, and so on. We finally settled on a set of keyed-alike Master puck locks and matching hasps to provide door security. We modified the hasps a bit to reduce their footprint, and put the mounting hardware underneath the lock itself for more security and aestetics.
- Ordered a front receiver from Sportsmobile and installed it (for carrying another motorcycle on the front, or a receiver mounted winch, or other handy things). Standard aftermarket front receivers would not fit due to the 4x4 conversion use of front leaf-springs, the mounts of which interfere with where most receivers mount to the frame rails.
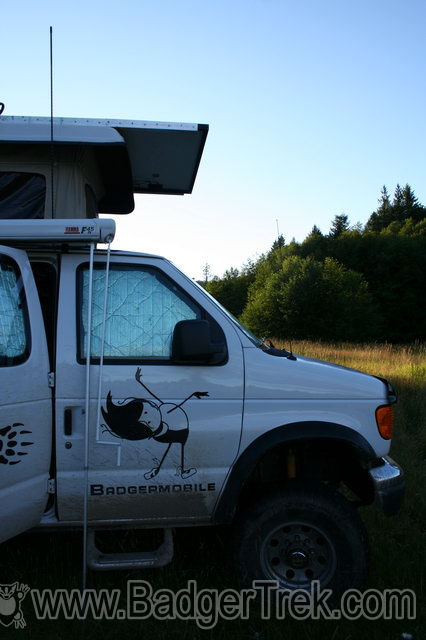
- Graphics for the van were cut at a local sign shop in the Seattle area (Issaquah Signs) based on Amy's layout and art. We installed the graphics ourselves.
- Used a 1" hole-saw to drill holes in the bottom ends of the 4 fender flares to let the accumulated and newly collected debris fall right out. The cavities have stayed empty and relatively clean inside since.
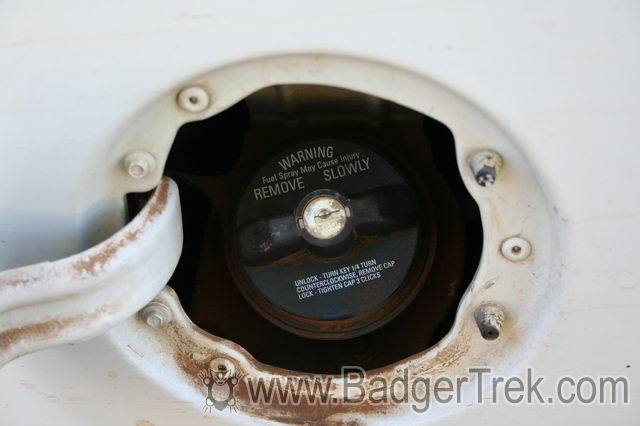
- Installed a locking fuel cap obtained at NAPA. With the rising cost of fuel it is a larger target, and Erik's parents had the unfortunate experience of finding all the diesel stollen from a piece of equipment they were renting. It also provides a barrier to fuel attendents who are so eager fuel up they don't consider that it is a diesel vehicle and grab the gasoline nozzle. This has happened a couple of times in Oregon where one is not permitted to pump one's own fuel. I now get out, unlock the cap myself, and verify that it is diesel they are pumping.