www.BadgerTrek.comAbout/ContactWeb LogOur Camper Van
Resources:Hobbies:MotorcyclesAmy's CakesOutboard Hydroplane RacingRadio Controlled Toys |
November 13, 2005 (E)
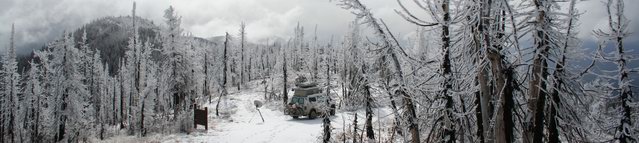
Sitting in a snow-storm among the rocky landscape of the City Of Rocks National Reserve in southern Idaho right now. We spent the last couple weeks in Salt Lake City visiting with Amy's sister, a bit of work on the van, and getting parts ordered for more van enhancements.
Yesterday we took a few hours and hiked around on the rocks, unfortunately we had to be well bundled up (40mph wind gusts blowing snow and sleet and air temp around 32). The landscape is much like that of Arches National Park in Moab, UT, just with granite instead of red sand-stone. We found caves, arches, fins, and lots of large bathtub sized bowls filled with water. 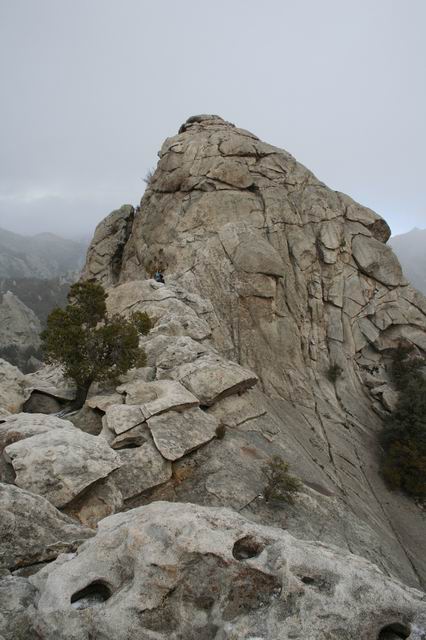
With the winter weather hitting, we have found that our power requirements are a bit more than our current system can handle, and we drain the battery down pretty low on a near-daily basis. This led to us ordering a second battery, a couple new large solar panels, a more efficient charge-controller, and a battery monitor so we know just how low we are going. I have put some details on the electrical system page.
With the battery monitor installed we were able to see exactly how much power was being consumed by our various toys. Sure enough the fridge, at 2.4amps and a near 50% duty cycle, was the big fish. Reducing this would be great for our power consumption. The fridge is mounted in a cabinet with about 1/2" gap on the sides, and an inch gap at the bottom (bottom gap designed for ventilation, but we added ventilation from the lower cabinet), which allowed us to add 1/2" of foam insulation on all sides, and an inch on the bottom. This reduced the duty cycle to about 25%, for a significant drop in power consumption (and its even quieter). The next biggest power consumer turned out to be the computer and monitor that, even when turned off, drew almost 1 amp together. So now we pull the fuses on them until we get our hands on a DC switch-panel for the computer cabinet. So far we have saved ourselves about 50amp hours per day from what we were pulling before, and on a 210amp hour battery that is quite a bit.
The battery monitor has also shown us that our old charge controller that came with the van was reading 0.2v low, and we were not dropping the battery down as far as we thought. Now we can actually count the amp hours we use, and how much goes back in so we always have a good feel for where we are at. The new charge controller is a bit more efficient that the other one too, and so that helps a lot on the cloudy days.
We are still waiting for the new panels to arrive in SLC, but we have received the new battery. We bought the metal to make an extended battery tray to hold both batteries, but have not had a chance to assemble it yet. We are hoping to do this when we visit a friend in Mountain Home, ID. We will also install a new set of front springs (the original ones were sagging a lot) and some extra leafs in the rear springs (rear was also sagging a lot).
The biggest issue at the moment however, is the penthouse roof mechanism. When arriving at City of Rocks and setting up camp we went to raise the roof as always, and there was a loud bang. Finding nothing immediately wrong (all latches were un-done, nothing was snagging, we continued and found that the passenger side of the roof was not raising up by itself. In fact, the end of the U-tube at the rear passenger side had ripped up through the upholstery and was waving about. We jacked up the passenger side in concert with the mechanism raising the driver's side to see what was broken. It turns out that the bolt that the bottom of the U tube hinges on had sheared for some reason. There is a deep gouge in the channel the bottom of the U tube rides in where the bolt had been hitting the side of the channel, and this may have contributed to it (it looks to have perhaps snagged on a hole that is used for assembly access that was never chamfered or deburred).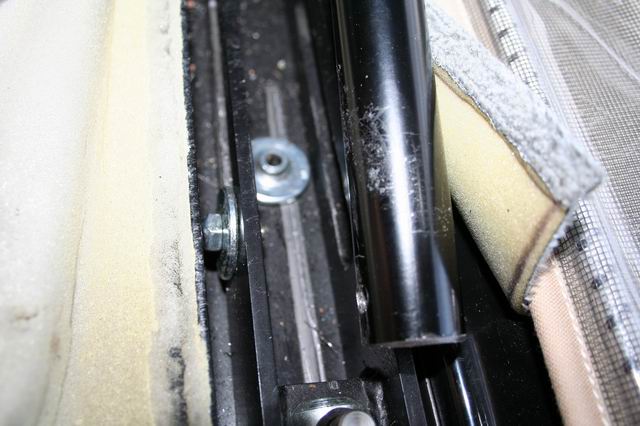
After finding the broken bolt (some pieces of which we still haven't located) we looked at the other side to see how it was supposed to go together, and what size bolt we needed for replacement, however over here the complimentary bolt had come un-threaded from the nut that holds it in, and was backing out of the U tube assembly. It is still holding, but is only a matter of time before it bend, breaks, or completely backs out. Access to the bolt is not possible without removing some of our cabinetry to reach the outside edge of the penthouse rail system.
The bolts in question are 1/4" bolts, which seems a bit thin to me, especially considering the stresses put upon them in raising and lowering the roof. The bolt that broke snapped at the threads where they entered the end of the U tube. In a double-sheer application like this I would think that a bolt with an unthreaded shank extending all the way through the U tube and the supporting bushings would be much stronger and much more preferable. I am looking at sizing things up to 5/16" and using A/N spec bolts with a longer shank to prevent this from happening again.
November 22, 2005 (E)
We spent the last week, after the City Of Rocks, at a friend's house in Mountain Home, ID. He is in the Air Force and recently got stationed there, and we were looking forward to seeing him as it has been well over a year since he last visited us in Washington. His new house has a nice flat paved driveway, which was wonderful for working on the van and doing the larger changes we could not do in Salt Lake City (where we are parked in a condo parking lot when visiting Amy's sister).
For each of the first few days there we were able to get one of the major tasks done. The first day we installed the new leafs into the rear springs, raising the rear of the van a couple inches, and making the interior level when parked on flat ground (it use to sag backwards a bit, more details on the exterior page).
While working on the springs we got a set of new bolts and washers that were overnighted by Sportsmobile West to fix our broken Penthouse mechanism. Since we were getting tired of being cramped in the van with the roof down, we approached these repairs the next day. Getting to the mechanism was a bit involved, requiring removal of some cabinetry, and the headliner boards on both sides of the van (as both sides needed repair). Looking at the way the whole stack of washers, bolts, slots, and tubes was put together made me think there had to be a better way. The broken bolt had sheared at the beginning of the threads, and the other one (with the backed-off nut) was actually bent in the same location. This implied to me that there were shear stresses on the threaded portion of the bolt, which is a no-no in all the ME texts I have read (the threaded portion of the bolt is effectively a lot thinner than the shank, and has the groves of the threads serve as stress risers).
By trimming a quarter inch off the bolts, filing a couple of the "conical" washers a bit thinner (wish I had my lathe with me) I was able to rearrange things so that all of the shear loads on the bolts were on the shank, and no extra spacing washers were needed. No photos as I was getting tired and just wanted to finish and button everything back together. This should hopefully be quite a bit stronger than the prior scheme, and allows the locknuts to have a number of fully-formed threads behind them so they won't back off. If further breaks occur, I will size up to 5/16 hardware.
The third day I almost got the front spring packs in, replacing the old ones, but got stuck at 5 with the sun-setting and still trying to figure out how to get the U bolts through the backing plate (they were sprung slightly wide after going over the axle). The next day a ride on the bike (at 28deg, very very chilly when riding 55mph) to the store got me a nice big C clamp which solved this problem and let me finish in the morning. I took advantage of the jacks being out and did the first tire rotation at this time.
The final big task for the week was to install the second AGM battery. I built a tray out of 2"x1/8" angle iron, braced with some 1 1/4" angle iron for locating the batteries, and all bolted together with some grade 8 bolts (wish I had an arc welder to simplify this, guess a MobiWeld goes on the wish-list). After painting this up on the 4th day, I dropped the old battery and began to do the work to move the hangers to accommodate this 46" long battery tray. Somehow in all of the measuring and re-measuring, and then drilling, I miscalculated and went right up through the floor and into the water tank (d' oh). The shame (and being soaked when the air temp was in the 20s) made me call it a day early. The next day I finished putting the battery tray in (more details on how it is hung in the electrical section), and started looking into how to fix the hole in the water tank.
Saturday I cleaned up from installing the batteries, and our friend took us into the airbase to show us around. We even got to see and touch some of the F-16s that he gets to fly (the bastard). No photos because I forgot to bring the camera, and don't know if I could have anyway.... We went to dinner in Boise that night, and had some good Indian food.
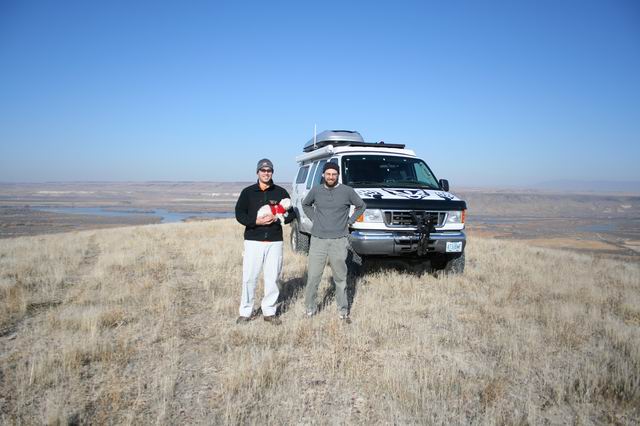
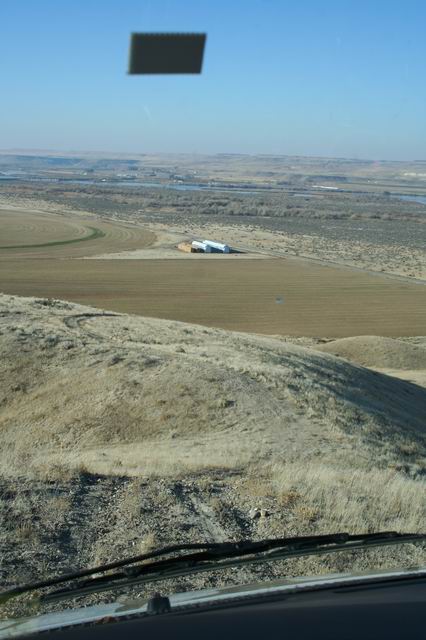
Sunday we had the van all back together from the work, and thought we would go show our host what it could do. We first visited the Bruneau Dunes state park, but no off-roading was allowed there (there were a number of old 4x4 roads, but all were marked as no driving anymore). We wandered around for a bit and finally found a dirt jeep track that went up some nearby hills. Since the ground in the area was very sandy in places, and the track had some deep ruts in places were people must have spun a lot we aired down to 35psi and tried going up. No problems, and the inclinometer registered over 30deg in some places (which sure feels and looks steep. The van just chugged right up, without even spinning the wheels much at all. At the top we had a nice view of the big dunes, so, after exploring a bit, we stopped and made grilled-cheese sandwiches before heading back to his place.
Heading down we took a few photos, which we had forgotten to do on the way up. The road drops away even steeper just in front of this photo.
The next day (Monday) we packed up early and drove back to Salt Lake City since we had no water tank, and had some mail waiting that we needed to look at.
Today (Tues) we did a bit of research, and figured that the water tank was Polyethylene, which is commonly used in food and glue containers. Not much will dissolve it, so cementing was out of the question, but it will melt. Calling around showed that it would cost a far bit to get the tank fixed (plastic welded) and unknown turnaround time. We instead went to the local office supply store, bought a small bottle of Elmer's glue (High-Density Polyethylene (HDPE) bottle), dumped the glue, and used the bottle plastic to seal the hole using my soldering iron. The tank looks good as new except for a slight discoloring in the patched area from some singeing when the iron was too hot.
Amy is working on preparing a Thanksgiving feast for us, her sister, and a friend, while I get the tank re-installed, add some more insulation to the van, and wait for the solar panels to arrive. Hopefully we can get back on the road again soon after Thanksgiving, though I do have to fly back to Seattle for the week following for a visit into work
Web Log Sections (Newest at Bottom):
- 06-2005 - Pickup the Van, First impressions, NYC Licensing Show
- 07-2005 - Work on the Van
- 08-2005 - Salt Lake City, Paragliding, & Work on the Van
- 09-2005 - Seattle, WA/OR Coast, to Magruder Corridor, & More Work on the Van
- 10-2005 - Western Montana, Wyoming, to Salt Lake City
- 11-2005 - City of Rocks, Mountain Home, ID, SLC
- 12-2005 - Moab, UT & Canyonlands NP
- 01-2006 to 02-2006 - Snowboarding and Seattle
- 03-2006 - Paris
- 04-2006 - Paris & London
- 05-2006 First Half - Paris
- 05-2006 Second Half - Southern France
- 06-2006 to 07-2006 - Return to the states and Yoga Center
- 08-2006 - Sportsmobile Rally, Colorado
- 09-2006 - End of Yoga, Bamf, Vermont, Boston, St Louis, Badlands
- 10-2006 - Work on Van (wheels, roof, wiring); Amy's version of last couple months
- 10-2006 Second Half - Amy's trip to Las Vegas; Great Basin NP
- 11-2006 - Nevada, Oregon, Motorcycle Race
- 12-2006 - Southern Oregon, California, Christmas, Aluminess Bumpers
- 01-2007 - Christmas w Shane & Laurie, Camping above Pacific Ocean
- 01-2007 - Pacific Ocean to Death Valley
- 02-2007 - Death Valley to Arizona
- 03-2007 - Zion NP, Grand Staircase NM, Bryce Canyon NP, Canyonlands NP
- 04-2007 - Utah through Arizona, Anasazi Ruins, Some tweaks to the van
- 01-2008 - Holiday trip through Northwest US
- 07-2008 - Spring and Summer 2008 (WiVi arrives!)
- 12-2009 - Camping Trip, Breakdown, and lots of Work on Van.
- Current